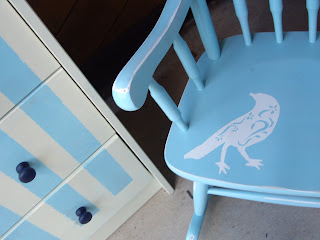
I got this dresser off of CL for $30. Check out DeckOutMyHome to see its progress.
Tuesday, July 19, 2011
Monday, February 7, 2011
Saturday, December 11, 2010
 Working on my Home {Not quite a vacation from Furniture}
 Since I've moved I haven't been able to work on furniture like I used to. I lack the room and time to do so. However, I am working on "Decking Out" my home. Check out my new Blog: DeckOutMyHome.blogspot.com. But please remember when you go there: that the blog is UNDER CONSTRUCTION. Let's face it, its ugly right now, but it will get better with time, along with my home that I'm slowly working on. Thank you!
Saturday, October 23, 2010
 {A Vintage BlueBird Armoire}
In My Home
My parents got me this Armoire for my birthday. I couldn't wait to get going on it.
Step by step creating a Vintage Bird on the cabinet door:
The armoire looked pretty good... other than the feet. Next step: tip it over and paint the feet. While waiting for that to dry, I ripped off the old backing (it had a huge hole in it) and put in some beadboard I had left over from a different project. Before putting the backing on, however, I antiqued it.
How to Antique:
Step 1. Paint the base coat. I mixed these three colors to come up with a vintage Patina Green. This will be the backing behind the cabinet doors.
Step 2. Water-down your antiquing color. I used black since my armoire is black. Get a wet rag ready (I like to use crochet rags since they have a lot of texture). Brush it on in little areas at a time. Try to do a whole strip at a time, from one end to the other-as shown.Step 3. Quickly wipe away with the wet rag. The paint should remain in the corners and crevices. This might take a little bit of practice. I antiqued while my patina green was still a little tacky so that the black would mix in and dull the color of the entire piece.
Here is the piece, ready to go!
I picked these wreaths up for $1 a piece. It took about 30 seconds to cut away the very fake looking ivy and flowers.
I hung the wreaths with patina green ribbon. I looped the ribbon around the wreaths, melted the ends together with a lighter, and stapled them to the top of the door (with a little wood glue here and there)
For the final touch I used 220 sandpaper to give the armoire a shabby chic flair.
I put a little hallowed decor on top. If you'd like to see how I made that sign click here.
And here it is. I think it turned out rather cute!
Saturday, October 16, 2010
 {Perfect Country Night Stands}
In My Home
I saw these night stands on a visit to DI. I eyed them, but they looked pretty ugly for $15 a piece. I completely forgot about them; until I visited again and they were still there, marked down to $8 a piece. I realized something: these will be perfect to solve a problem we have in our bedroom: my husband likes to find places to stash clothes he doesn't want me to wash yet.


I took them home and sanded them down and decided to paint them shabby white to match our bed.


I didn't paint the large tray in the bottom of the night stands because I wanted to do something REAL nice. I went to trusted Lowes where I got some pressboard cut to 1/8" smaller than the dimensions inside the tray. I got 1/2" foam and some sweet leather fabric and did a little upholstered insert.

Here you can see why the nightstand works so well. He can shove a lot of clothes in there.


Tuesday, August 10, 2010
Friday, August 6, 2010
 {Vintage Parlor Table} -SOLD-
Table & Chairs $195
This has been one of my favorite projects so far. The chairs turned out one-of-a-kind each with a small bird on the seat. The table is approx. 48" in diameter.
It would look great as a parlor table or it would be an inspiring craft table.
Table: Comparable Piece
Chairs: Comparable Piece
Subscribe to:
Comments (Atom)

 Check Out This Dresser's Progress


